Navigate360: START Advising-Appointment Summary Reports
How to write Appointment Summary Reports for START Advising
Before START
- Log in to Navigate360 (Navigate360: Accessing the Navigate360 Platform)
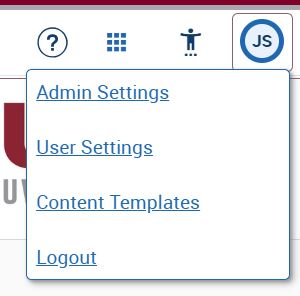
- Towards the top of the screen, click on the circle with your initials or picture at the top of the screen.
- Click the User Settings link.
- Scroll through the other settings and look for the Default Care Unit and Default Location options.
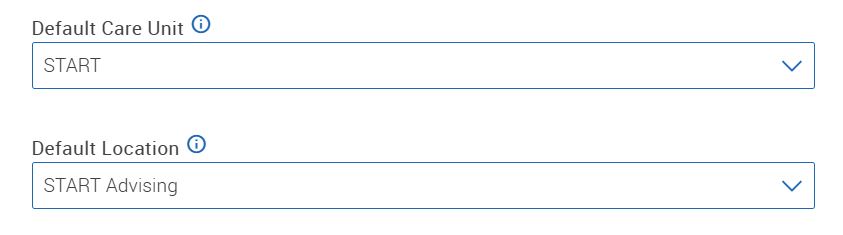
Change the Default Care Unit to START and the Default Location to START Advising from the drop-down menus respectively. - Scroll to the bottom of the page and click SAVE

After START Advising Appointments
- Log in to Navigate360 (Navigate360: Accessing the Navigate360 Platform)
- Search for the student by name, ID, or email address from the search bar at the top of the page.

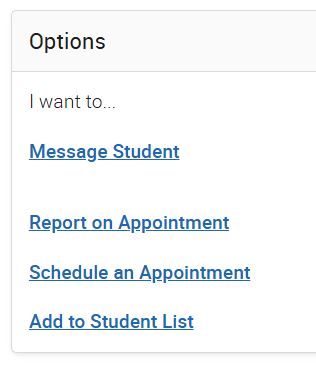
- On the student's profile page, under their picture, find the Options Menu., Click the "Report on Appointment" link.
- A new dialog box will open. This is where you will write your appointment summary report.
- On the left side, as you have set your defaults previously, all you need to do is select the correct Service-Start Advising. Do not worry about changing the time and date to be correct.
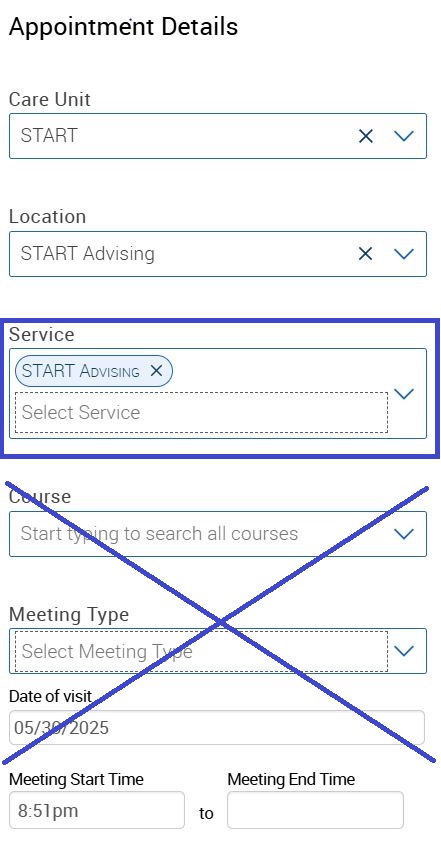
- The right hand side of the page is where you will document what was discussed in the appointment. Always remembering to leave out any personal or confidential information (Navigate360: Writing notes in an appointment summary reports).
-
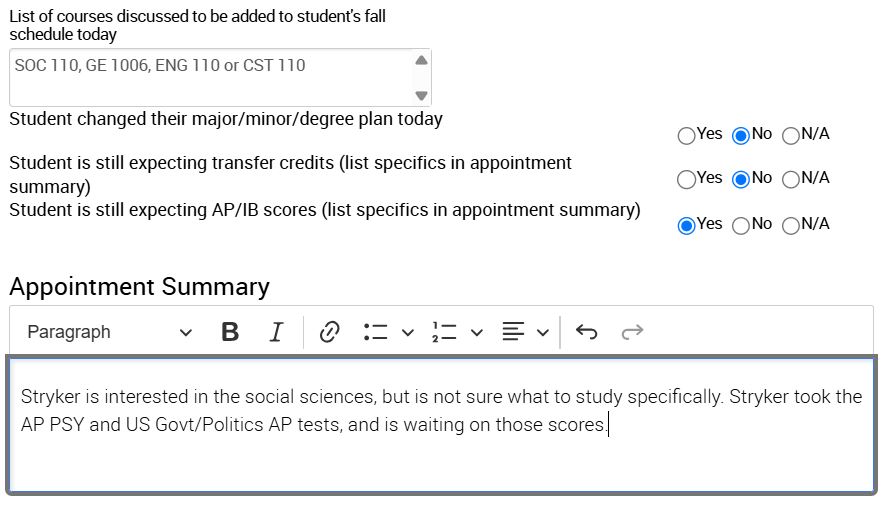
List possible course options that were discussed Use the radio buttons to identify if student made changes to their degree plan while at START
If the student is expecting Transfer Credits or AP/IB scores, check the proper radio button, and then write details in the Appointment Summary below.
This text box area is to write any specific notes that will assist others who may help the student after START. Include information about AP/IB or Transfer credits, majors, minors, pre-professional interests. - When you are finished, click Save