Topics Map > Academic Advising
Navigate360: Scheduling a student appointment from the appointment center
1) From the top of the Navigate360 page, click his symbol: 
2) Select Appointment Center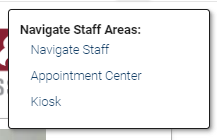
3) Select Your Location

4) Enter the Student's Name, Service, and Staff Member from the top filters.

The calendar options will narrow down on the listed scheduling options dependent upon the selections you have made. You can also use the Find First Available button to jump ahead to the next known available spot on the advisor's calendar.


5) When you have found an available time on the calendar, click the time block within the calendar. A new window will open.

6) Select the service from the dropdown menu, enter the Student Name, confirm the date and time. Enter any comments that will be helpful for the appointment-such as Jane wishes to discuss courses for the upcoming fall semester.
7) You can select for the student to receive a text or email reminder. The student is the "non-organizer attendee" by selecting the appropriate check box.
8) Click Create Appointment.