Navigate360: Edit an appointment campaign
How to edit a previously created appointment campaign in Navigate360.
Locate the Campaign Icon along the left tool bar.

Select Appointment Campaigns from the campaign page

A list of campaigns you have previously created (Navigate360: Creating an appointment campaign) will appear, click the title of the campaign you wish to edit.
On the right side of the page, look for the "Edit Campaign Details" link.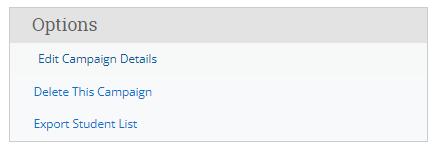
Utilize the menu options at the top of the next page to edit the various sections of the appointment campaigns.

Follow the more specific instructions in this article: Navigate360: Creating an appointment campaign
To ADD RECIPIENTS to a campaign, follow the directions here: Navigate360: Add students to an already created campaign