Navigate360: Setting up availability
Availability allows staff to indicate the days, times, locations, and services for which they are available to meet with students. Staff can choose whether the availability active duration is for a specific term, a specific set of dates, or forever. Staff can set availability for appointment scheduling, drop-in visits, and/or appointment campaign purposes.
It may be necessary to set multiple availabilities to meet your needs. Availabilities can overlap.
1) To start, make sure you are on your Staff Home page. (Navigate360: Staff Home Overview) Select the tab that says, "My Availability". Find the Actions menu, and select "Add Time."

2) A new menu will appear. Start by selecting the days of the week you are available. Then, select a time range. In the example here, the first appointment could be scheduled at 8:00am, while the final 30 minute appointment could be scheduled at 4:30.

3) Select how long you want the availability to be active. You can set your availability for:
- A semester which will be active beginning the first day of the semester, and end the last day of the semester
- A specific date range
- Forever, which is effective immediately, and has no end date

4) Select if you would like this availability to be included in your Personal Availability Link. This link allows students to be brought directly to your calendar instead of having to "find" you in the Navigate360 scheduler.

5) Specify for which type of appointments you are available for during this time:
- Appointments are pre-scheduled by the student with you through Navigate360
- Drop-ins would be times where a student could just stop by your office or your virtual office space to ask a question
- Campaigns are appointments that you reach out to the students to initiate (Navigate360: Creating an appointment campaign)
6) Select the meeting types a student can choose from for this availability, you can choose more than one:

7) Select your care unit

8) Select your location
This will be your office space if you advise as part of an advising office on campus (AACCS, SSS, OMSS, for example) or My Faculty’s Office/Faculty Meeting-Virtual.

9) Select the services for which you are available. The list of possible services will be pre-populated based on your assigned role in Navigate360.

10) You have the option to insert a virtual meeting link here:

11) If you have special instructions you want your students to know, you can include them here. Good things to include are your office location for in-person appointments, instructions about how to contact you virtually. If there are specific things you want a student to do before the meeting, putting that information here can be helpful.

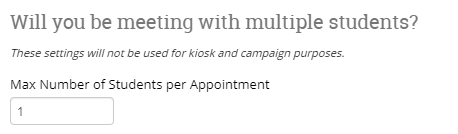
12) Select if you would like each appointment slot to be available to one student at a time, or would you like it to be available for more than one student for group advising?
13) Make sure to save your availability.
