Navigate360: Creating an appointment campaign
Appointment Campaigns are an important feature that allows staff members to reach out to specific populations of students to encourage them to schedule appointments.
In order for your students to be able to create an appointment with you through a campaign, you must first make sure that your Outlook calendar is synced with Navigate360 (Navigate360: Microsoft Outlook 365 Sync) and that you have set your availability within Navigate360 to include campaigns (Navigate360: Setting up availability).
1. To start, click the Appointment Campaigns Link from your the left hand toolbar.

2. From the Campaigns Menu, under Appointment Campaigns, select "Add New".

3. Define your campaign

Campaign Name: The campaign name is visible to you and other staff who have access to view campaigns, but is not visible to students.
Please use the following format to name your campaigns: Your Name, Current Semester, Purpose
Examples: Jamie Schweiger, Spring 2026, Fall 2026 Advising; Mic Nauman Fall 2025 Students on Probation
Instructions or Notes for Landing page: This message will appear on the top of the page where the student is selecting an appointment time.
Select your Care Unit, Location, and Service based upon your availability.

Appointment Limit: The number of appointments any one student can make in the campaign
Appointment Length: The system will default to 30 minute appointments, but you can adjust the time to a longer or shorter length here.
Slots per time: How many students should be able to schedule an appointment during each time block. Unless you plan to do small group advising, leave this at 1.
You can check boxes to further configure appointment options:
- Allow a student to schedule an appointment over a time when they have a class
- Restrict Scheduling to Assigned Staff Only (this is only important if running a campaign with more than one advisor)
- Who should receive reminders, and what type?

Scheduling Window: This determines the start and end dates that you wish a student to schedule an appointment between.
Launch Date: This is the date that your initial message to the students will send, and when they can start scheduling appointments for future dates within the scheduling window.
Click Continue
4. Add Students to your Campaign
You can use various searches to narrow down students to add to your campaign. First, under Enrollment History select the current term. If you are just looking to add all of your assigned students to the campaign, select the "My Students Only" box at the bottom of the page. When you have selected various search criteria, click the Search button.
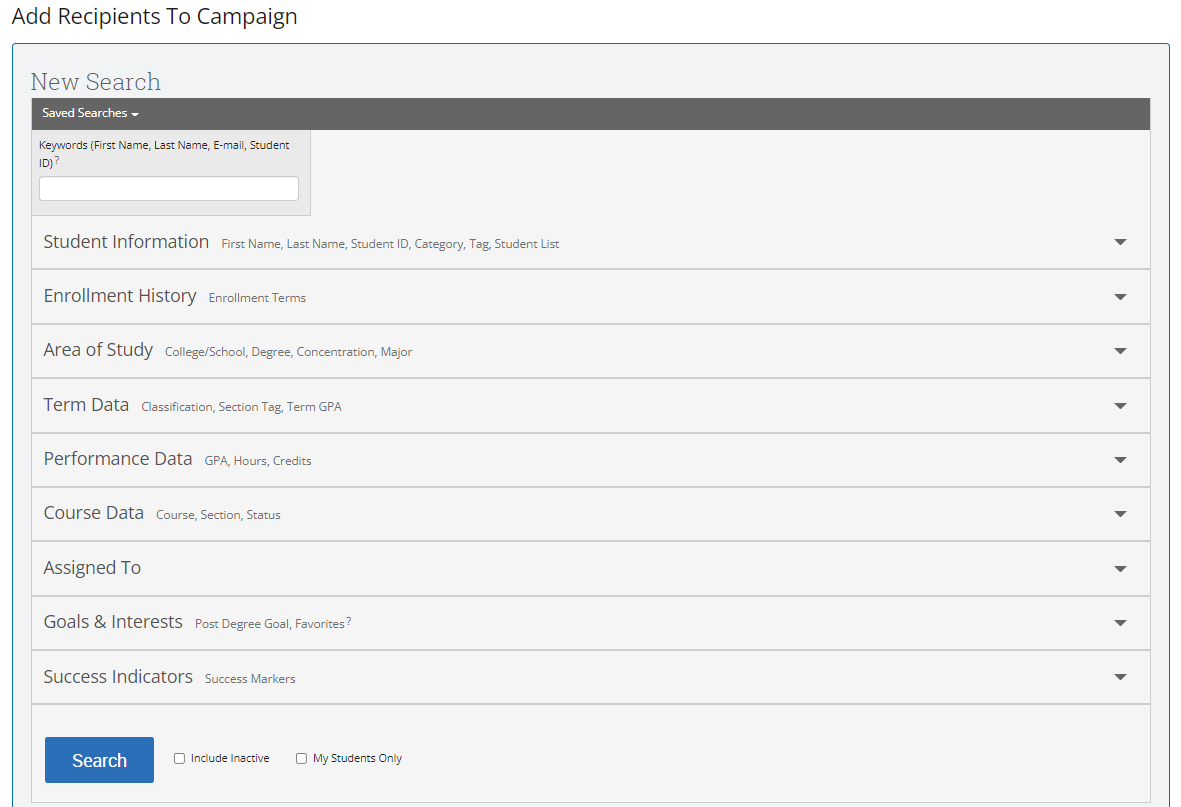
The next page will display students that meet the search criteria you selected. Select the box next to each student's name you wish to add to the campaign, or check the top box to select all.

*If your search has resulted in more than 100 students, and you wish to add them all to your campaign, watch for the message at the top of the student list that will allow you to select all:
Click Continue
Review the list of students for accuracy on the next page.
If you find students that you wish to remove, click the box next to their name, and then under the Actions menu, select "Remove from campaign."

If you wish to add additional students, click "Add more recipients" at the bottom of the page, and return to search for more students.
Click Continue
5. Add organizers to your campaign. This is most likely, yourself, but could also be other advisors in your department.d

Click Continue
5. Compose Nudges (messages) that your students will receive.
First, you must add a Welcome Message, this is the message students will receive as the initial request to schedule an appointment. There will be pre-populated text in the message, but you are able to change the messaging including the subject line of the email.
Example Welcome Message:
Hello {$student_first_name}:
Please remember that registration for Summer 2024 begins on March 28. Registration for Fall 2024 begins on April 4. You have a specific registration day and time for both Summer 2024 and Fall 2024. You can view those dates on your WINGS on March 9.
If you still need to schedule your advising meeting with me, please do so by using the link below.
{$schedule_link}
Thank you!
As you make changes, you will see a preview of your message on the right side of the page.
You have the option to use Merge Tags which will pull in the student's name and/or schedule into your messaging. You can also include attachments.

Select the date you want this message to be sent.
Click Save Nudge
You have the option to add more than one nudge to your campaign. For example, you may want to send an initial request for an appointment, and then one week later send a reminder to those students who have not yet scheduled an appointment. Navigate360 will NOT send the reminders to those students who have already scheduled an appointment.
For your follow-up Nudges, you can elect to send them via email or Text Message. Please only use text message towards the end of your campaign, to catch those students who have not responded to the previous messaging.
The process to create further email nudges is the same as composing your welcome message. To send a text message nudge, select SMS as your nudge type:
The menu will change to allow you to set up a text message.
You are limited to 300 characters, as you type your message in the Compose SMS text box, the message will show a preview on the right side. You can include a link for the student to schedule their appointment, but it is not required. Remember to identify yourself and that you are from UWL in all text messages sent through Navigate360.
Select the date that you wish to send the nudge.
Click Save Nudge
5. Compose a Success Message (Optional)
You may wish to send a final message to a student after they have scheduled an appointment. If so, click "Add success message."
Just like in the nudge, you can make any changes to the message, and see a preview message on the right side of the page.
Click Save Success Message
Confirm that you have composed all of the messages you wish to. Click Continue.
Verify that all of your campaign information is correct. 
When you are satisfied with the settings of your campaign, you can send it out to your students. Click "Start Campaign."

You are able to make changes to your campaign even after it has been sent: Navigate360: Edit an appointment campaign. You can check the progress of your campaign: Navigate360: Monitor an appointment campaign.